
Philips Hue’s Lightstrips have some really nice features, and they can work really well in various places in your house – especially behind your TV, and in your kitchen. In-fact, I’m considering using them in my kitchen but I wanted to know exactly how many Lightstrip packs to buy since I may need to cut them.
I’ve read that you can cut them with the ‘V4’ Lightstrips, but how do you then re-attach them and re-use them if you’ve only purchased one pack? I wanted to find this out, and more, before adding smart lighting to my kitchen – hence this post.
Philips Hue Lightstrips can all be cut (every 13″/33cm), but only the newer Lightstrip Plus V4 models can be ‘officially’ re-attached later. Alternatively, you can use third party connectors such as Litcessory’s ones.
Overview of Philips Hue Lightstrips

Installing LED light strips around the house has become increasingly popular in recent years, and so Philips Hue’s smart LED light strips – the Hue Lightstrip range – was always fairly inevitable.
They can be installed in a range of places, although the most common areas around the home are:
- Behind the TV, to create some great mood lighting effects. You may be able to sync the lightstrips to whatever’s playing on your TV too (using HueSync), but this can vary depending on the lightstrip model and how you play content on your TV.
- Underneath counters and shelves, which is especially useful in a kitchen to create nice ambient lighting.
- Around desks (such as computer desks) to allow you to ‘set the mood’ of whatever you’re doing/watching. Playing a desert-based PC game? Set the lightstrips to a yellow-orange color! Watching Frozen (be honest)!? Set the lightstrips to blue or whitey-blue.
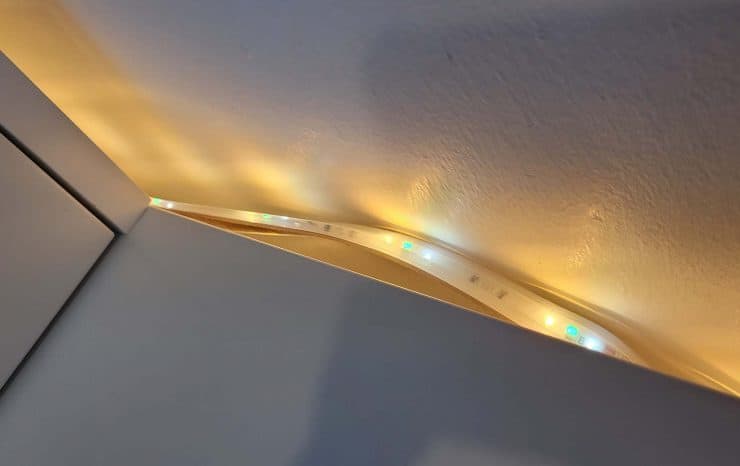
- Around the ceiling, where there’s coving or cornices. This can really help a room stand out, and be used to provide some nice lighting – especially at night-time where you may want dimmed, yellow light to simulate sunset.
An example of Hue lightstrips being used above a door can be seen in the below YouTube video:
There’s been four main generations – which Hue call ‘versions’ – of the indoor Lightstrip over the years. The indoor Lightstrip is called ‘Lightstrip Plus’. There’s then an ‘Outdoor Lightstrip’ model which is waterproof, along with ‘Hue Lightstrip Play Gradiant’ which sits behind the TV and mirrors the color of what’s on the screen.
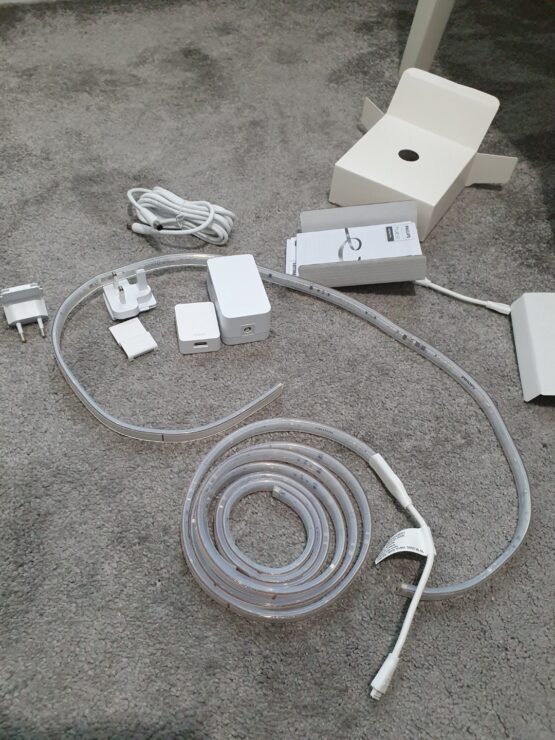
I cover this more later, but what’s common for all Hue lightstrips is that they’re all ultimately powered by being plugged into a wall socket (attempts to hardwire them would break the warranty):
Different Generation/Versions Of The Hue Lightstrips
As mentioned earlier, there’s three main types of Hue lightstrips:
- Indoor ones, referred to as Philips Hue Lightstrip Plus.
- Outdoor (waterproof to IP67), called Philips Hue Outdoor Lightstrip.
- ‘Behind TV’ lightstrips, a range launched in September 2020 and called Philips Hue Play Gradient Lightstrip.
The outdoor lightstrip was first released in August 2018 and is still on its first generation, as is the Play Gradient lightstrip. However the indoor Lightstrip models have had a few iterations:
- Hue Lightstrip – released in 2012-2013.
- Hue Lightstrip Plus V2 – released in 2015, offering 1,600 lumens – a big increase on the original light strip.
- Hue Lightstrip Plus V3 – released in 2017, which was mainly a design revamp.
- Hue Lightstrip Plus V4 – released in June 2020, offer a connector to re-use cut parts on other Hue light strips.
In terms of being able to cut, bend and re-attach Hue Lightstrips, they’re all bendable but cutting and re-attaching them are only officially supported with the recently-released indoor Plus V4 model.
However since there’s always been demand for cutting and re-using Hue lightstrips, various third party approaches exist for some of the other models – I cover this in the final section.
Bending Philips Hue Lightstrips
Unless you’re running your light strips in one big row, you’ll probably need to bend them at some point. This may be so that they can turn a corner between two perpendicular surfaces (such as between two walls or a corner kitchen cabinet), go around a curved surface or being run around parts of your desk.
If you want a fairly gentle bend, then you’ll easily be able to do this with any Hue Lightstrips (or LED light strips in general) due to the material they’re made out of – a bendy rubber/silicone type of material.
However if you need to make a sharper, 90° angle bend then you have two main options:
Option 1: Just Bend The Strip Directly
If you’re able to, simply bending the strip directly is probably your best option – you just need to make sure that your bend doesn’t damage the light strip itself. In other words, you should avoid bending where there are solder joints, light diodes or resistors:
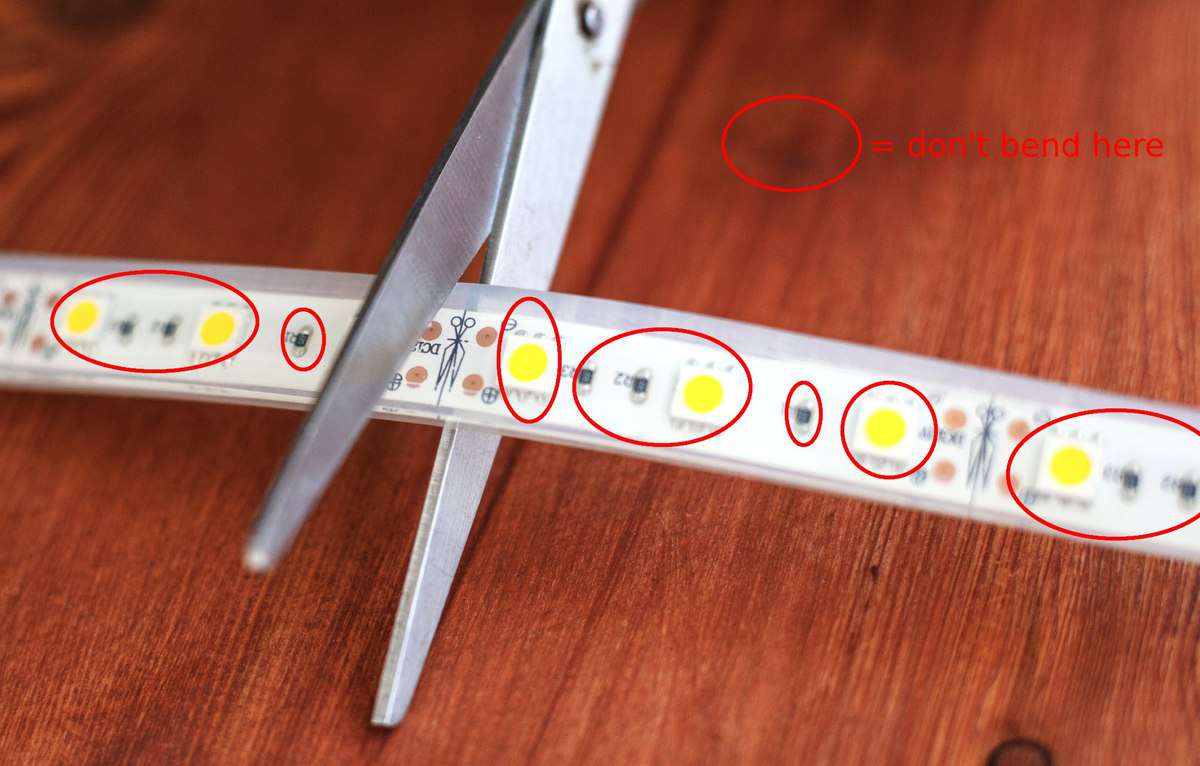
Hue Lightstrips have ‘cut here’ marks, and these are the perfect place to make a bend.
When bending, you should ensure that you don’t just create a bump (in the corner) in the lightstrip, since this will lead to having too many LEDs in that corner area – resulting in a poor overall lighting effect.
The best way to make a bend in this case is to fold the strip 45° in the opposite angle to how you want it bent (so that the strip itself now has a 90° corner), and then bend it back the other way:
Option 2: Buy A Corner Joint
If the above method won’t work for any reason, you can instead purchase a third party corner joint known as a ‘corner connector’. You cut the two strips at the cut intervals, and then re-attach them using the corner connectors.
This can work really well, and it leads to a slightly nicer overall finish than method 1 – even if it is a bit annoying to have to purchase extra connectors.
It’s worth noting that Philips Hue’s Lightstrips are known as ‘6 pin’ LED lightstrips, meaning that you need to ensure any corner joint you purchase is also ‘6 pin’ compatible. Otherwise your lightstrip might not work correctly (or at all) afterwards.
Cutting Then Re-Using/Re-Attaching Hue Lightstrips

The Hue Lightstrips Plus are expensive at $75+ for the main pack, meaning that if you need to cut them (due to having a gap in your intended run, for example), you’ll probably be wanting to re-use the off-cut at a later date.
Therefore it’s great that the Plus V4 model released in mid-2020 supports re-using off-cuts, right? Well…
Unfortunately it’s not quite that simple. Firstly, Hue Lightstrips can only be cut every 13″ (33cm) – a larger distance than many of their competitors:

This means that sometimes your main (usable) strip will end up longer or shorter than you would have liked – ditto with your off-cut strip.
But assuming your off-cut is a usable length, you can only attach it to another Lightstrip Plus V4 kit using the included connector:

The reason I say that you can only attached it to another kit is because the cut-off end needs to be powered, and run through a controller (remember that the Hue Lightstrips ‘talks’ ZigBee, meaning that there must be a Hue Lightstrip controller). Unfortunately you can’t buy the Hue controller separately.
This means that in order to use the official cutting feature of the V4 light strips, you need to buy two lightstrip packs – costing around $150. This could become very expensive, especially if you only want a 40″ (1 metre) run, then a gap, then another 20″ (50cm) run – you would have enough Hue Lightstrips from a single pack, but the off-cut couldn’t be used within buying a separate pack (with a separate controller and power device).
Is there a solution to this problem? And what about V2/V3 light strips? Well thankfully, yes you can cut and re-use off-cuts using adapters from Litcessory. You can also link a cut-end piece to the Hue extension kits, and then carry on the run – saving you money in the process. You can use adapters from other companies too, but Litcessory are the main provider and you can buy off their website and also Amazon, so I thought it best to just cover them here.
Using Litcessory to re-attach and split Philips Hue Lightstrips
Litcessory’s FAQ page and blog cover a few common use cases of combining Hue Lightstrips with their connectors, although I wanted to walk you through how I could use a Hue Lightstrip Plus kit and two extension kits – along with Litcessory products – to add smart lightstrips to the following part of my kitchen:

So overall it is a bit less than a 145″ (3.7m) run, but there’s a gap for the dishwasher. This means that I have two options for installing Philips Hue Lightstrips. I can either purchase:
- Two separate Hue Lightstrip Plus kits (costing around $150) – one for the left-hand area, one for the right hand area.
- A Hue Lightstrip Plus Extension kit (costing around $20) – to extend the right hand area run, as the standard kit is only 78″ (2m).
- This option would cost me up to $170, and lead to a lot of waste on the left-hand run which is only 24″ (60cm)
Or I could buy:
- A single Hue Lightstrip Plus kit (costing around $75) – I can use this on the right hand side.
- Two Hue Lightstrip Plus extension kits (costing around $40 total) – one will be used on the left hand side, and the other on the right hand side to extend the run there.
- Two ‘controller to 6 pin’ Litcessory connectors ($30 total)
- One Litcessory splitter ($15)
- This comes to a total of $160, and reduces waste of the Hue Lightstrips… but produces extra ‘waste’ (of resources) by having to include three extra connectors.
It’s a tricky one. Neither is a great option. But in terms of why I’d need three Litcessory connectors, their blog post explains it very well but the gist is that the Litcessory splitter (the device which means that I can run a Hue Lightstrip extension into a single controller) must be connected to the Hue controller via a ‘controller to 6 pin’:

In this case, it probably isn’t worth me buying the Litcessory connectors – I may as well spend a tiny bit more money and have two separate Hue light kits. Of course, these will then work independently of each-other which is another flaw.
Litcessory connectors get around this (as all the Hue lightstrips link into a single Hue controller), plus you can actually link a lot more than just 2-3 Hue Lightstrips. You just need to make sure that the total run of Hue lightstrips (going to a single controller) is no more than 33 foot/10 metres.
Since this is a very useful article, I’ll leave my additional bit of knowledge here for the passerby: Philips Hue Lightstrip Plus v4 use the same power and connector as Philips Hue Play lights. Lightstrips come with a single connector adaptor, the larger Play adaptor has three connectors. So one can for example use a free connector on a Play adaptor to power a Lightstrip, and everything works fine.
Awesome, thanks for that helpful info!
BTW I have tried this but the Hue Play power adaptor cannot supply enough power to the lightstrip v4 so you end up with only the 1st 10~ led light up.
Great article.
I have a question about extending the lightstrip to the top of the wall hanging kitchen cabinets.
The plinth lightstrip installation walkthrough is amazing, as a follow up how do you suggest I could extend the wiring to the top ?
Thanks! Regarding the case between wall hanging cabinets, one approach that I’ve heard of is to use Ethernet (CAT5/CAT6) cable:
You could potentially use a thin white Ethernet cable and it wouldn’t be easy to see (assuming your walls are also white).
cat5 isn’t advisable for extending LED lighting strips, it’s not sufficiently rated.
https://www.ledspace.co.uk/blogs/help-advice/cat5-rgb-led-strip
TIL 🙂 Thanks for that Andy, that’s helpful to know.
Hi, do you have any links to right angle and straight connectors that are compatible with the V4 Philips Hue light strip, everything I have read seems to suggest there are none that are compatible with V4 only V3.
Many thanks,
Pete
Hi Pete,
Sorry for the delay in my reply. Litcessory do now support V4 Hue too: their online shop allows you to choose which version of Hue lightstrip connector you want.
Amazon sell some of these products too – check for the “V3” or “V4” at the end of the title https://www.amazon.co.uk/s?k=litcessory+hue+v4&crid=133BWI0985FU1&sprefix=litcesspr%2Caps%2C173&ref=nb_sb_ss_sc_1_9
Thank you for the helpful article. You mention you buy a total of 3 light strips (one base and 2 extensions) but your schema only shows 2 which confuses me. Do you have a base and an extension on the right side of the dishwasher (facing it) and one extension on the left side? Where is the power supply/controller located? Thank you!
Thanks! And good question, it is a bit confusing. I didn’t show it (you’re right), but the second extension would have plugged directly into the main Hue Lightstrip kit. So as you say, I would have a base and extension on one side, and an extension on the left side. I put the power supply/controller behind my dishwasher where I luckily had a wall socket.
FYI, in the end I actually went with a DIY Gledopto solution for my kitchen lightstrips, but what I mention would work fine with Hue Lightstrips.
I didn’t read this prior to doing a similar installation. In my case, I simply went with a Litcessory 1m extension cable that I could tuck behind the toe kick of the dishwasher, so ended up with the same end look, but only required one Litcessory extension cable. If memory serves, the cable was about $15 also – I had a three pack of them. So knocked another $30 off compared to using 3 Litcessory products as outlined above. And a simpler linear installation to keep track of going forward – no need to trace back to a splitter if there is ever a problem.
For my next project I really have to figure out an alternative power supply – I have so many cut offs with the Hue strips that I would love to do something with but need to keep buying a new kit in order to obtain a power supply….
Ah that’s an interesting solution, thanks for letting me know that the Litcessory $15 cable worked well – that’s great to know. Glad you got your set-up working nicely.
P.S. yes it’s really frustrating that Hue don’t sell the power supply/controller separately; I would purchase a lot more Hue Lightstrips if they did sell that separately, knowing that I could easily use any off-cuts.