
The Ring Floodlight Cam is one of Ring’s flagship pieces of smart home technology. This light handles security, motion activated lighting, and a variety of other features. Making the most of the Ring Floodlight Cam is all about how you mount it.
For more users, the standard mounting works best. Simply attach this light to any vertical wall and wire it into an existing socket or another type of connection. But what about when you need to mount it on a soffit or ceiling? Is this possible?
The Ring Floodlight Cam can be mounted upside down on soffits, ceilings, and other similar surfaces. In fact, there are ways to mount this camera that do not impede its use at all. There are a few tips and tricks to mounting this camera exactly where you need it.
Recap: The Ring Floodlight Camera
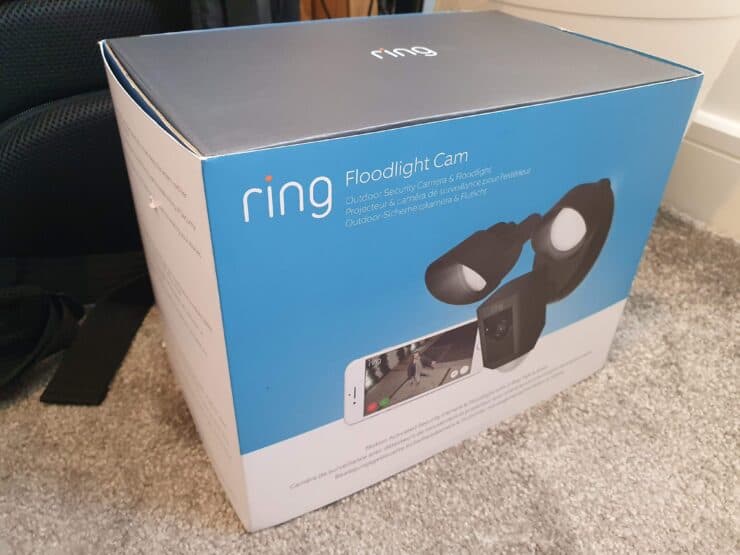
This is one of Ring’s flagship products – heck, it’s certainly one of their most expensive! The Ring Floodlight Cam is a motion sensor light, home security system, and alarm rolled into one. This Floodlight Cam is controlled via the Ring app and can also be voice controlled using Alexa.
This floodlight camera packs the kind of price tag that goes with any flagship device and this means that people want to make the most out of their investment.
This camera is designed to be mounted upright on a wall, but what if you wanted to mount it upside down or on a slanted surface? Let’s take a look at all of the other ways we can mount this light.
How To Mount A Ring Floodlight Camera The Normal Way
Let’s get to know just how the Ring floodlight mounts before we start changing things up.
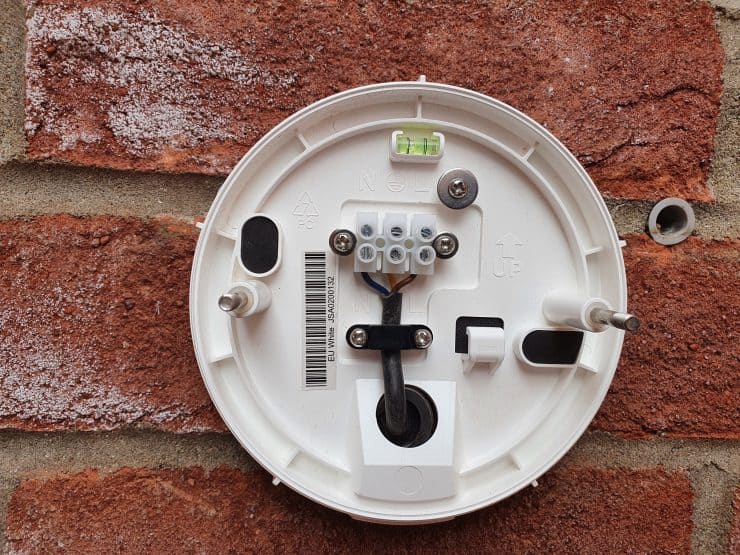
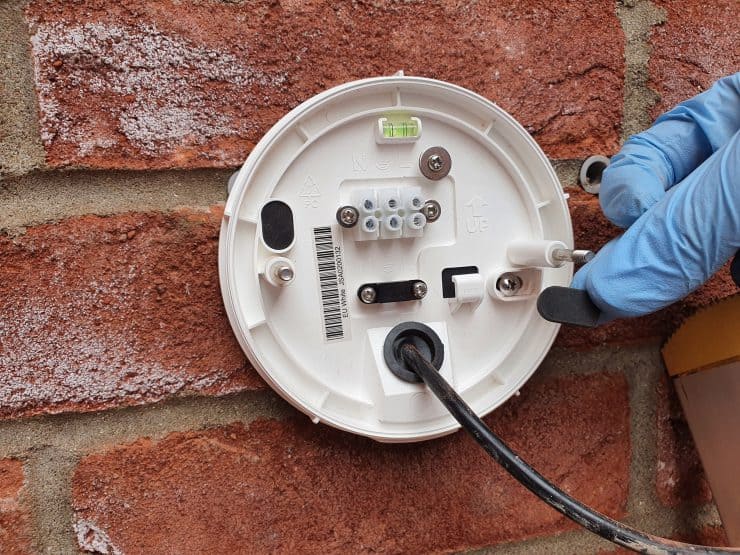
This light is powered via a physical connection into your home. This means that it needs to be wired into an existing physical connection. Most of the connections for exterior lighting are good enough for this light, but if you don’t have one of those you’re willing to sacrifice, you’re going to need to call an electrician to wire up your connection.
After that, it’s as simple as following the directions. You firstly install the back bracket onto the wall, then wire this up:
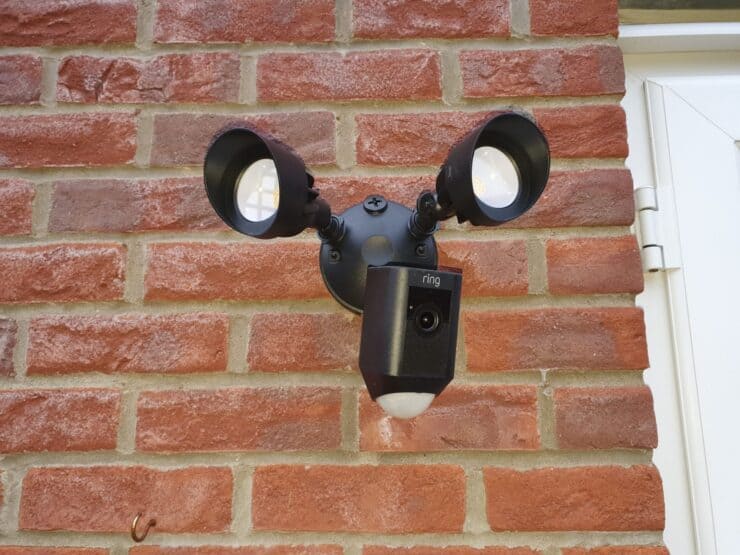
You then just place the front cover/housing (containing the light and camera on it) above this – screwing them in place with the hand screws:
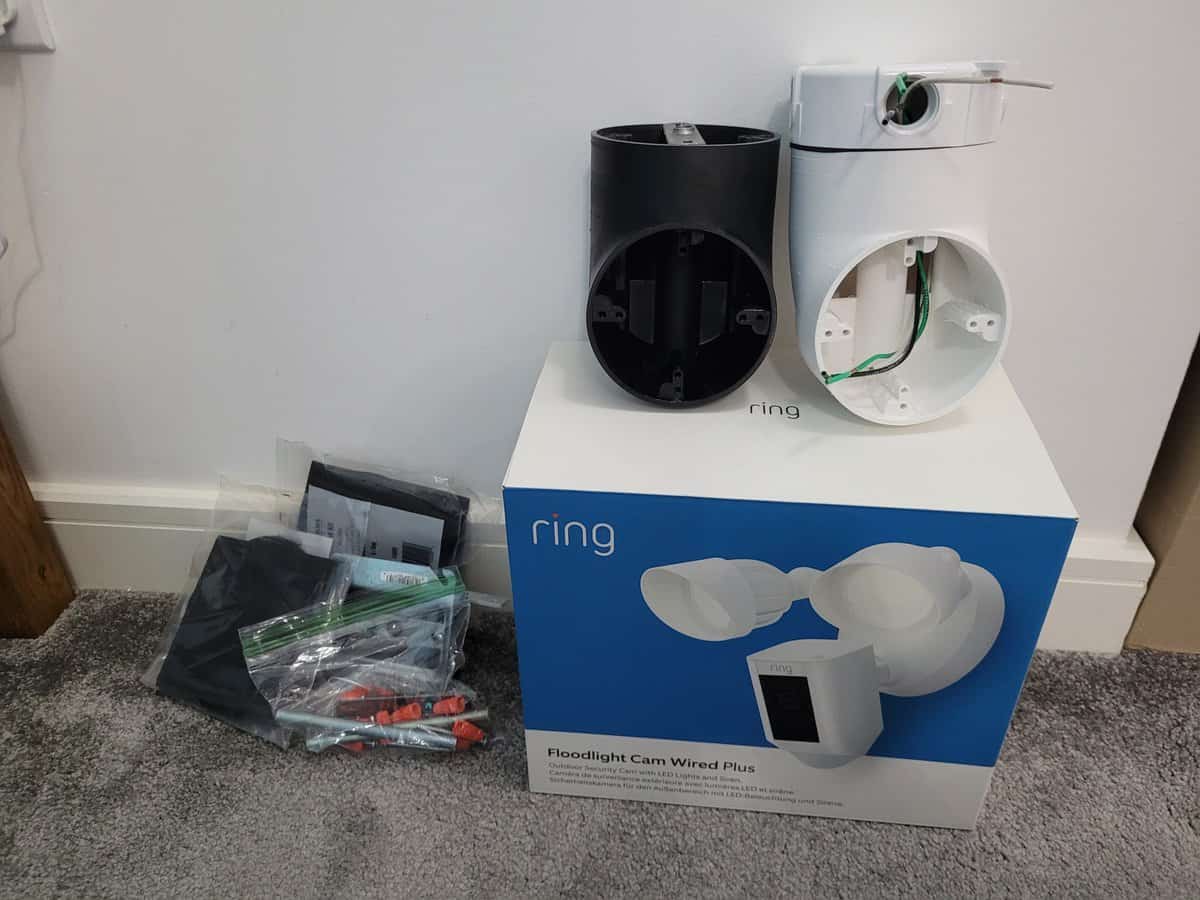
The Ring floodlight comes from the factory with a mounting bracket and all of the screws you’ll need to get the job done included right in the box.
That’s good to know… but what should you do if you want to attach this light to a horizontal surface or even upside down?
Mounting It Upside Down, On Angles, Or On Slanted Surfaces
This light has earned its position as Ring’s flagship device. It’s entirely possible to mount this upside down with little to no problems along the way, and Ring even confirm this on Twitter:
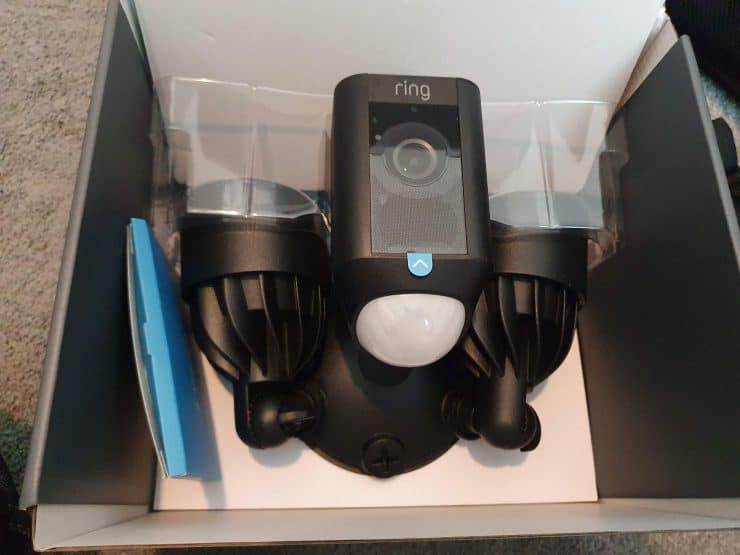
This Ring camera has a good level of versatility because the camera is on a ball mount, and the lights can be spun around quite a lot too – indeed, the camera is upside within the box when it’s first delivered:

But as usual, there are some caveats – such as the possibility of water ingress when mounted completely upside down, and getting the camera pointing in the right direction (which may require a warranty-breaking DIY hack!). Before discussing those points in detail, let’s take a quick look at a few different surfaces you can get this light connected to.
How To Mount A Ring Floodlight On Eaves
Eaves, soffits, and awnings are all possible mounting locations for this light. The challenge here comes from making sure you’ve picked a suitable location and making a few considerations:
- First, make sure you’ve picked a dry location. Some of these surfaces can get wet when it rains and that can lead to a damaged or broken floodlight. After that, you want to pick a location that has the wiring you need.
- Most soffits and eaves weren’t built with wiring in mind. This means you will likely need to call on an electrician to wire a connection to your desired location. Depending on the complexity of the job and the market in your area, this could be a quick and affordable job or a bit of a hassle.
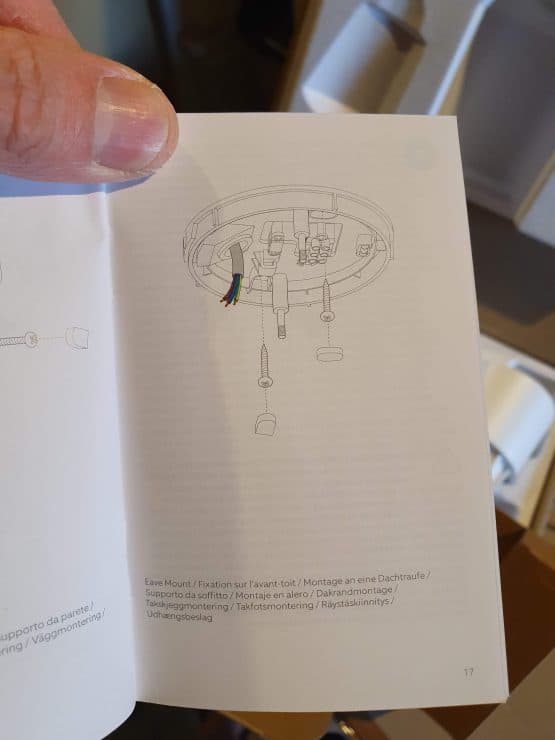
Thankfully this is meant to be possible, and the manual for the Floodlight Cam Plus shows specific steps for this:
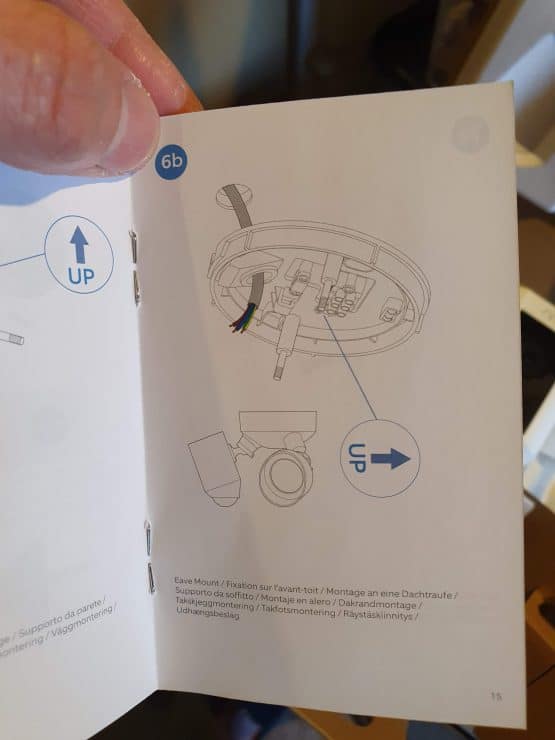
Just be sure to add all the rubber grommets in to prevent any water ingress:
However this install can be a bit tricky, and the risk of water ingress will always be present with an ‘upside down’ install. The alternative is to purchase a custom mount, such as those sold on Etsy:
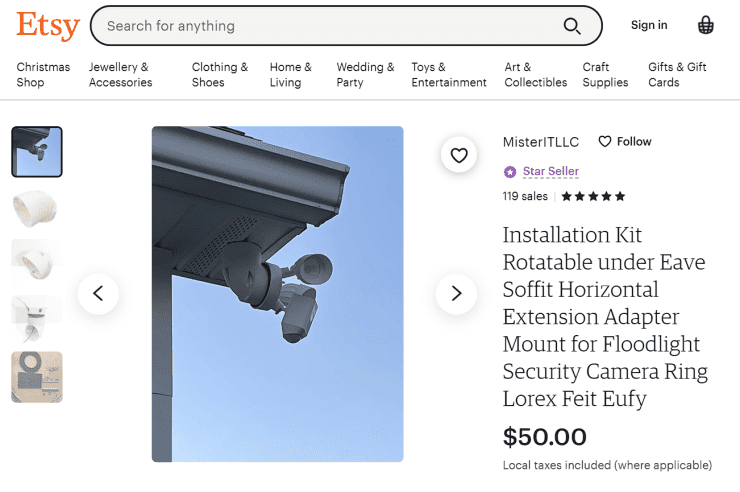
Buying a third-party mount is the option I recommend the most, because it massively reduces the risk of water ingress – plus it’s more flexible than using Ring’s standard mount. Here are some pictures of MisterITLLC’s under-eave mount:


Mounting On The Ceiling
Here’s where we get some interesting challenges.
Mounting a Ring floodlight on the ceiling comes with all of the challenges of mounting it on a soffit or an eave, but there are a few other problems to consider.
The biggest issue here is weight. The Ring Floodlight Camera isn’t heavy by any standards (it’s around 4 lb/1.8kg), but you still want to make sure your mounting location is correct. This means picking the right type of mounting hardware. Your ceiling could be made of drywall. In this case, you’re going to need some drywall anchors to make sure that this camera doesn’t come loose over time.
Ceilings do come with the advantage of better wiring. If you’ve got a lighting fixture you’re willing to sacrifice, it likely has the right wiring for this camera.
The Biggest Challenge – Getting the Camera Angle Right
Here’s the biggest challenge of unconventional Ring floodlight mountings: the camera angle.
If the camera or the PIR sensor have shallow angles thanks to having the whole unit upside down or on an angle, you are going to get a significant reduction in your field of view.
There are two hacks that let you regain the full range of this sensor’s performance. The first one is a quicker, easier solution that doesn’t give as much flexibility. The second one we’ll look at is a more robust solution that requires making some physical changes to your Ring Floodlight Camera.
An Easy Hack for Mounting the Ring Floodlight
This ‘easy hack’ won’t give your camera (or its motion sensors) much range with this method, but you also won’t have to grind away part of your Ring camera either (which we look at later…). It’s all about your goals for your smart home system.
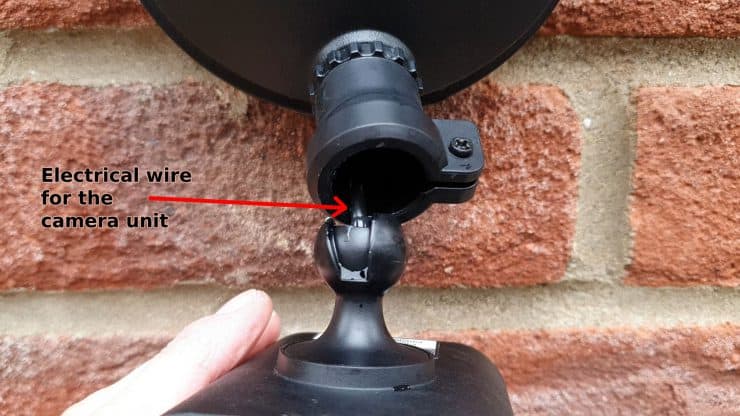
Firstly, you’re going to want to make sure you have enough slack in the wires going into the camera to be able to move it around freely. You’re also going to want to unscrew the screw that keeps this ball socket intact:
After that, simply rotate the camera housing 180 degrees, pop it back into the socket, and tighten up that screw.
This will give you the reverse of the normal camera angle. This allows you to optimize mounting on awnings, eaves, and ceilings without having to damage the camera’s casing. This can also keep your warranty intact as long as you reset the Ring floodlight camera if you send it in for repairs. We won’t tell Ring if you won’t!
A word of warning though: the camera unit itself is fairly heavy, so make sure you support it with your hand when adjusting it in the ball mount – otherwise the camera will be resting entirely on the electrical wire (and so it could fall to the ground, especially if there’s a bit of a loose connection inside the main body):
However if your mounting position means that you need more flexibility, there’s a ‘better’ approach – albeit one that will break your warranty.
Hacking Your Ring Floodlight Camera the Hard Way
This is a bit of a serious hack. If you go down this path, your warranty is certainly toast. The good news is, it’s also a great way to get your camera angles perfect for any mounting location. To do this hack, we are going to make some physical modifications to the ball joint that the camera connects into.
Here’s a quick video tutorial from YouTube if you want to get in-depth instructions:
The first step is to loosen the screw that keeps the ball socket together. This will allow you to temporarily remove the camera from the socket. The screw has a very small nut that keeps it held in place. Be careful not to lose this. You’re also going to want to make sure you have enough slack in the wire to slide the camera out of the socket.
The next step needs some tools. A dremel or any other type of small saw, grinding, or cutting tool can get this job done. Simply grind away some of the plastic, so you create a u-shaped recess on the opposite side of the one the factory made. The goal here is to essentially recreate the same joint, just mirrored, so we can flip the camera the other way.
Once you’ve made your recess, pop the camera back in the socket, screw it together, and now you can tip the camera backwards. This will let you enjoy a fuller range of motion for your mounting needs.
Keep This in Mind When Trying Out These Mounting Options
There are a few things to keep in mind when taking these unconventional approaches to mounting a Ring floodlight camera.
The Ring Floodlight Camera Warranty
The first thing to consider is that both of our hacks for changing the angle of the camera can void your warranty.
While the easy hack can be quickly reversed, it could still be considered a modification that goes against the terms of the warranty. The other hack pretty clearly changes the device permanently and also voids the factory warranty. If you’re planning on relying on the warranty for the full year or throughout your Ring Protect Plus plan, you might want to come up with other mounting solutions. Either that or deal with suboptimal angles.
Another thing to keep in mind are the elements.
Keeping Your Ring Floodlight Camera Dry
The Ring Floodlight is designed to be mounted right side up and on a vertical surface. This mounting gives it the optimal protection from the weather and namely from water damage. Changing this mounting position could allow water to enter into the unit and cause serious damage.
If you’re considering mounting this on an eave or soffit, think about the path water takes when running down your roof. These overhangs are great at channelling water away from your walls and foundations, but that doesn’t mean they don’t have leaks or don’t get wet themselves. If the water will route directly towards the Ring Floodlight Cam mounting, you will need to protect against this which may involve:
- Repositioning the Floodlight Cam if required.
- Apply silicon sealant to try and waterproof it…
- …or some other waterproofing material (such as specialized tape).
One last major thing to keep in mind is wiring.
Powering Your Floodlight Cam
These Ring cameras are not self-contained units. Unlike smaller smart cameras and lights, these require a physical connection into your building in order to stay powered up.
This means that you might need to run wiring to your overhand, ceiling, or other location in order to get these lights hooked up right. Depending on the location you pick, this could mean calling in an electrician.
Keep these tips in mind, and you’ll be able to mount your Ring floodlight camera wherever you choose!
Is there a wireless ring floodlight camera, n if it’s available, where can I get it?
Hi Yvonne, the Ring Floodlight Cam is wireless in the sense that it uses Wi-Fi (not Ethernet). But it does need to be wired into the home’s electrics (i.e. there’s no battery version). Sorry for the long winded answer, but I wanted to clarify since “wireless” can mean two separate things here.
You might want to check out the Ring Spotlight Cam instead, which does have a battery version.