
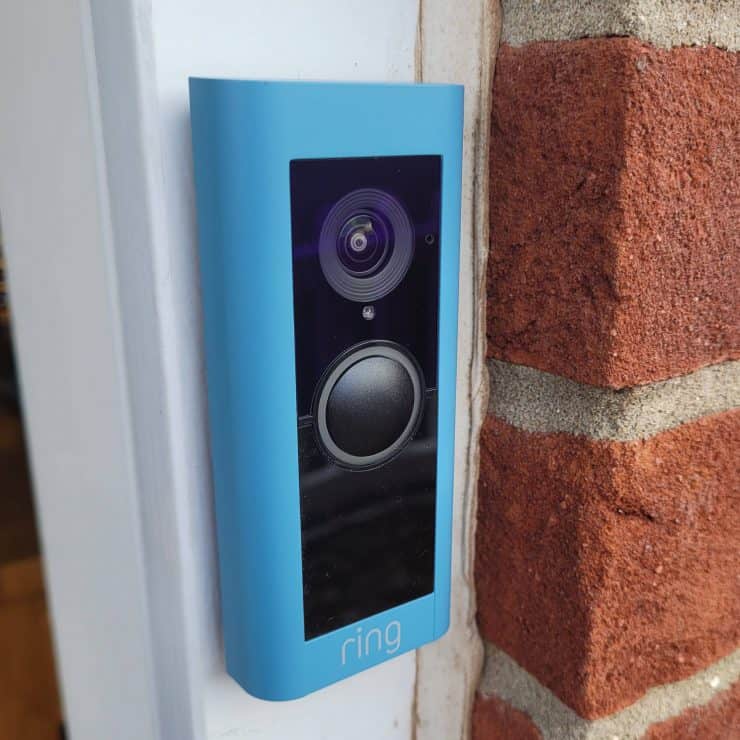
Several Ring Doorbells rely on rechargeable batteries instead of permanent power sources, making them convenient and easy to install. Still, as time passes, the battery within your Ring Video Doorbell loses its charge and may require replacement.
Therefore, knowing how to change your battery is important to ensure the device remains operational without interruptions. This process is generally quick and straightforward, but a little preparation goes a long way.
Here’s a comprehensive guide to replacing your Ring Doorbell battery, including some helpful tips to make the process a lot simpler.
Key Points
- Ring Doorbell Battery replacement is a relatively straightforward process.
- You’ll first have to remove the faceplate using a screwdriver before taking out the old battery.
- You can choose to recharge the battery or replace it with a new one.
- After that, put everything back together and confirm if your device works.
Ring Doorbell Battery Replacement: Prerequisites
The battery-operated Ring Doorbells feature a quick-release battery pack which can be used to change the batteries. But since their batteries are protected behind their tough outer shell, you will need a screwdriver to take down this shell.
Below is a complete breakdown of what you should have and do before proceeding to the next steps.
1. Get A Screwdriver
When you first unboxed your Ring Doorbell, you probably noticed an unusual screwdriver with a distinctive star shape tip. This is the screwdriver we are talking about. It is included to help you remove the security screw of the faceplate whenever you want to recharge the device battery.
If misplaced, you’ll need a regular screwdriver with a security torx bit that fits the screws on your doorbell model. You can check your Ring Doorbell user manual for the exact size needed.
2. Have a Replacement Battery
You will need a replacement battery that’s compatible with your specific Ring Doorbell model. In case you will be recharging the battery, you should have a micro-USB cable and a power source such as a wall adapter or computer.
3. Power Down the Ring Doorbell
Let’s be safe here. We don’t want to run into any electrical hazards and create another problem while trying to resolve one. So, if you want to safely remove the old battery, it would help to temporarily turn off the Ring Doorbell in the app. Turning off the device will also help avoid those surprise recordings while you’re tinkering around.
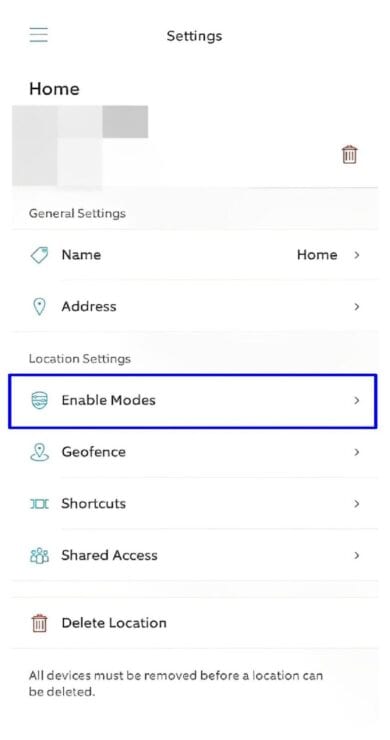
To make this happen, go to your Ring App on a phone or tablet and click the three bars on the top left side of the screen.
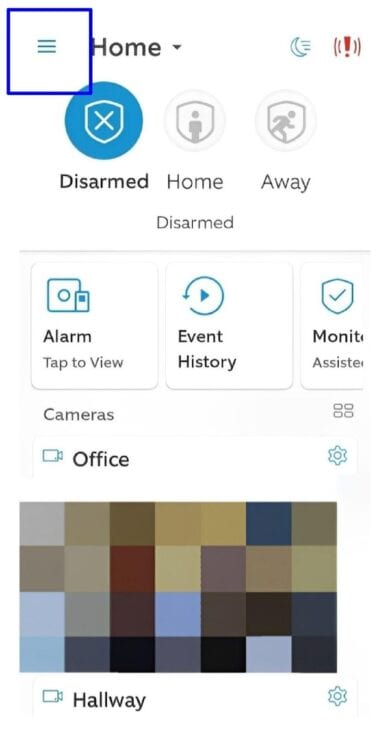
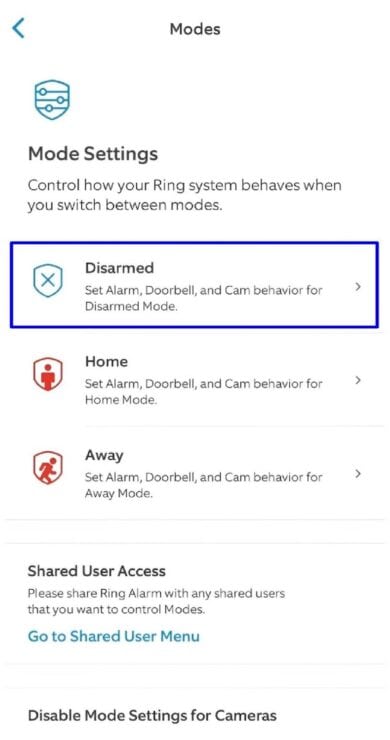
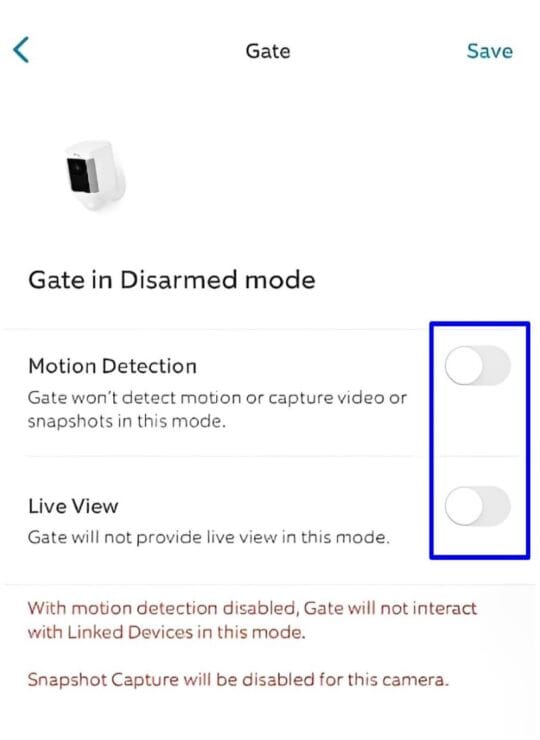
Select settings and if you scroll down, you’ll see “Enable Modes.” Click on that and from the menu provided, choose “Disarmed Mode.”
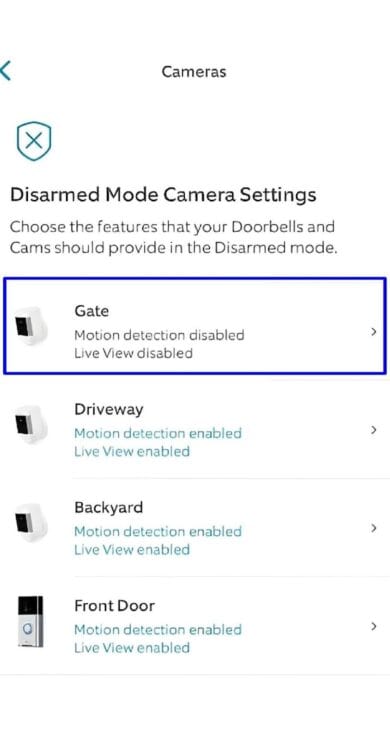
Now pick the specific doorbell you want to disarm, and then toggle on “Motion Detection” and “Live View.” Using the Disarmed Mode will temporarily deactivate your Ring device.
Learn what to do if your Ring battery dies after charging or hardwiring it.
How to Replace Ring Doorbell Battery: Step-by-Step Guide
The most challenging part of all these steps is to figure out how to open the battery chassis. But once you burst it open, the other steps will fall into place.
Step 1: Remove the Faceplate
Use the provided screwdriver to take out the security screws at the bottom of your Ring Doorbell. There are usually four screws on the sides used to hold the faceplate in place.
Go ahead and insert the screwdriver, apply a little torque, and turn it counterclockwise until the screws loosen. The faceplate will remain tightly attached to the outer shell even after taking out the screws.
Once the screws are out, carefully put the tips of your index and middle fingers on the front plate and then push the faceplate upwards using your thumb. Be gentle so you don’t drop the cover, as you may damage it. If you’ve done everything correctly, it should come off smoothly.
Note: If you own one of Ring’s first-gen doorbells, instead of the faceplate, you have to lift the entire doorbell frame up and out of its mounting bracket.
Step 2: Remove the Battery
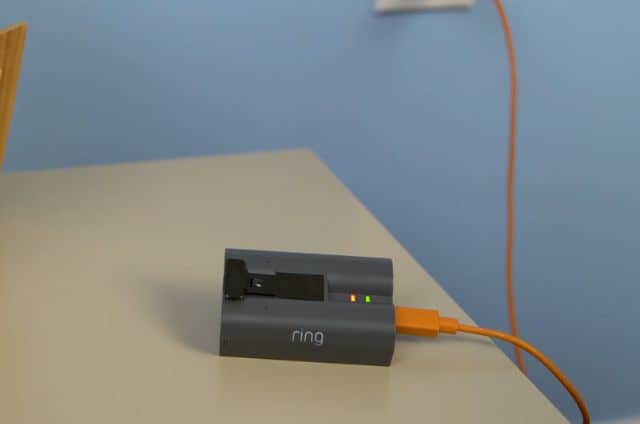
After removing the faceplate, you will now be able to access the battery compartment. At the top of the battery, you’ll notice a quick-release tab, which is black and has a rectangular shape.
To take out the battery, press lightly on the quick-release tab using your index finger and then slide the battery out from its compartment. Be gentle and precise.
The battery used by Ring Doorbells is rechargeable and should not be treated as regular household waste. So, if you are to dispose of it, do so properly according to your local battery disposal regulations.
Step 3: Recharge the Battery
Find the USB port at the back of the doorbell and then insert the small end of a micro-USB cable into the port like you would a charger into your phone. There should be a USB cable provided inside the original packaging of your Ring Doorbell. If you don’t have it, then you can use any micro-USB cable that you have handy.
After doing that, take the micro-USB cable and connect the other end to your chosen power source.
You can charge your Ring doorbell using either a wall outlet or a USB port on a computer. Charging from a computer’s USB port can take up to 10 hours. However, for the fastest charging (around 5 hours), use a 2.1 amp wall charger, like the one that comes with your smartphone.
When the battery is all powered up, the indicator light on the cell will show a solid green. That’s the signal to disconnect the charging cord and move ahead to the next step.
Quick Tip: For extended battery life, consider purchasing a spare battery so you can have one charging while the other is in use with your doorbell.
Step 4: Return the Battery/Replace It
If you are replacing the old battery with a new one or using the recharged one, the process remains the same either way. Simply align the battery correctly and slide it into the compartment. But take care to insert it facing the right direction. Ignoring this can potentially damage your device.
Continue pushing it in until the black rectangular tab snaps. This sound means the battery is securely in place. Now, you are ready to move on to the next step of reattaching the faceplate.
Step 5: Reattach the Faceplate
As soon as you’re done changing the Ring Doorbell battery, it is time to put the faceplate back on. Take the faceplate and locate the small plastic hook situated on the upper inner section of the cover. Once done, hold the faceplate at a 45-degree angle, aligning the hook with the hole.
Slide the faceplate from the top down and apply light pressure until you hear a snap. This confirms the faceplate is secure.
After that, use the provided star-shaped screwdriver to tighten the security screw back in place. Do so by turning the screwdriver clockwise until it is snug. Be careful not to overtighten it—you could damage the cover!
Note: Using the same procedure, you will have to reattach the entire doorbell frame to the mounting bracket for first-gen Ring doorbells.
You‘re Done!
That’s it! You have successfully replaced the battery on your Ring Doorbell. It wasn’t too complex, was it?
With all that out of the way, it is time to power up your Ring Doorbell again to see if everything is working correctly. Press and release the small power button on the side or back of the doorbell and wait for the device to establish a connection.
After that, deactivate your Ring Doorbell “Disarmed Mode” to activate its sensors and alarms. To do this, open the Ring App on your phone or tablet and click on the three bars at the top left of your screen. Select settings, scroll down to “Enable Modes,” and click on it.
Now choose “Disarmed Mode,” pick your specific doorbell, and then toggle off “Motion Detection” and “Live View.”

You can test that your doorbell is actually working by pressing its button. Then, check if the motion detectors work by walking around where the device sets to detect motion.
Additional Tips
While Ring makes it easy to replace your doorbell’s batteries, here are a few helpful tips to help make the process even more streamlined.
- Invest in Solar Charger: Use a solar power source to extend your Ring Video Doorbell’s battery life. With about 4–5 hours of direct sunlight each day, you will not have the hustle of recharging your battery-operated device every few months. The Ring Doorbell solar charger is compatible with:
")
- Battery Video Doorbell Pro
- Battery Video doorbell Plus,
- Video doorbell 2
- Video doorbell 3/3 Plus
- Video doorbell 4
- Make Use of the User Manual: It’s always a good idea to refer to your user manual for specific instructions and safety information for your Ring Doorbell model. The manual will have all sorts of helpful info about setting up your doorbell, taking care of it, replacing its batteries, and fixing any problems.
- Battery Life Matters: Just like your phone, extreme heat or cold can drain your battery faster. So keep your Ring out of direct sunlight or freezing temperatures. Also, you can always use the Ring app to monitor your battery health.
- Get a New Rechargeable Battery: You should consider purchasing a backup battery since a Ring battery can take up to ten hours to recharge. See it this way: As the original battery is charging, you get to use the backup battery to ensure no downtime for your device.
- Know When to Get Rid of Old Batteries: Ring provides their devices with a 6000 mAh capacity lithium-ion rechargeable battery that can work between 6–12 months on a full charge. So, if yours doesn’t last that long and you are tired of swapping batteries all the time, consider buying a new battery from Ring’s website. It could be that your battery life has badly deteriorated.
Frequently Asked Questions
What Type of Batteries Does a Ring Doorbell Use?
Ring doorbells operate on rechargeable lithium-ion batteries for the majority. You can still purchase a second battery as a backup power as it helps extend the life cycle of your primary battery. However, consult your specific model’s manual to know the exact battery type your device requires.
What Happens if the Ring Doorbell Runs Out of Battery?
Your Ring Doorbell notifies you in the home app when its battery needs charging. You will receive a notification warning of a low battery level before the device shuts off. However, if you ignore it until the battery dies, motion alerts and live view won’t work.
How Long Does It Take to Fully Charge a New Ring Doorbell Battery?
The duration it takes to charge a Ring Doorbell battery varies. Using a computer’s USB port can take up to 10 hours but charging via a 2.1 amp wall charger (like your smartphone’s) cuts down that time significantly. It’s the fastest option and you can expect your Ring Doorbell battery to be fully juiced in 5 to 10 hours.
How Can You Check the Ring Doorbell Battery Percentage?
To view your Ring Doorbell’s battery level, launch the Ring App and tap the three horizontal bars. After that, pick “Devices,” choose the doorbell you wish to check, and scroll to “Device Health.” Now look for “Battery Level,” and you’ll see the percentage remaining.
Bottom Line
Having to change batteries on your device is sometimes a hassle for many people. With Ring Doorbells, however, the process is straightforward and can be done fairly quickly.
By following these steps, you can maintain the effectiveness and longevity of your Ring Video doorbell. And if you are an average user, you won’t worry about replacing the battery for at least one year.
If you have any questions, feedback or suggestions about this article, please leave a comment below. Please note that all comments go into a moderation queue (to prevent blog spam). Your comment will be manually reviewed and approved by Tristan in less than a week. Thanks!