
Usually, a wired Ring Video Doorbell requires an existing doorbell wiring system for power supply. But that doesn’t mean its installation is still not possible and even doable—particularly if you do not have another doorbell installed.
Today, we’ve created a step-by-step guide that should be a good help for you with beginning the installation of a Ring Doorbell without existing doorbells. We’ve thrown in a few bonus tips and tricks to make the installation easy.
Key Points
- Use a transformer or a plug-in adapter to provide the doorbell with the appropriate voltage.
- But safety first! Turn off the power to the doorbell breaker before starting the installation.
- After that, connect the transformer/plug-in adapter wires to your doorbell wires using screw terminals.
- Finally, mount the doorbell using the bracket and screws provided, then get the Ring app to configure your device.
How To Install a Ring Doorbell Without an Existing Doorbell
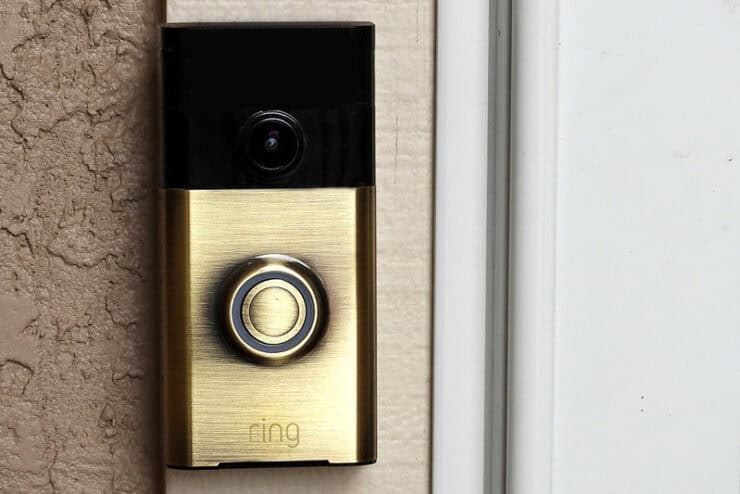
Because the wired Ring Video Doorbell does not have a battery, it relies on a wired connection for power supply. It, therefore, requires an existing doorbell system to function properly. But since you don’t have an existing wiring in place for your doorbell to draw power from, your best bet would be to use a transformer or a plug-in adapter.
1. Installation Using a Doorbell Transformer
")
The most crucial part of a wired Ring Doorbell installation is ensuring that the device receives the appropriate and only the appropriate voltage it needs.
If you don’t have a doorbell installed yet, chances are high that you do not have a wired doorbell transformer. This transformer is a key component that steps down the high electricity voltage inside your home to a safe level.
Since Ring Doorbells can not handle the power coming from your home’s electrical panel, the voltage must be lowered. That’s what the transformer does.
Ideally, your Ring Doorbell can work with Doorbell systems that supply 8–24 volts AC, 40VA max at 50 or 60Hz.
The transformer is often attached to your electrical junction box. A junction box is basically an electrical wiring system connecting the wires throughout your house. It offers a better solution to manage the wire connections in the breaker.
Note: If you already have a chime box, determine what voltage the chime requires before getting a transformer. For instance, get a transformer with a minimum of 16 volts, 10VA, if that’s what your chime uses.
3. Installation Using a Plug-in Adapter

It is easier to install the Ring doorbell with an adapter that can be plugged into a power outlet rather than hardwiring it. It is a simple adapter with a built-in transformer that ensures your Ring Doorbell is getting the appropriate voltage it requires.
The plug-in adapter plugs into a standard wall outlet, taking the power from the outlet and turning that into 8-24V. One side of the plug-in transformer goes into your doorbell, and the other goes into a wall outlet.
You see, this method avoids the hassle of wiring the whole system, installing a new transformer, and even the need for a chime box. All you have to do is plug the adapter in and connect the Ring doorbell. It is a quick plug-and-play solution you can pretty much set in a few minutes.
Note that Ring specifically designed a plug-in adapter for Ring Doorbells 2, 3, and 3 Plus. The adapter is similar for these devices, with a voltage requirement of 8–24 volts AC.
Understand your smart home’s electricity consumption for improved energy efficiency and management.
Installing Ring Doorbell Wired Without Existing Doorbell: Step-by-Step Instructions
Now that you know how a transformer or a plug-in adapter works, you can proceed to what comes next. The initial installation and mounting is essentially the same for each Ring Doorbell model, and you can do it yourself without any professional help.
Safety First: While this process may seem easy, it is important to keep in mind that Ring Doorbell’s installation involves electrical wiring, which is potentially dangerous. If you are not familiar with electric system, then hiring a qualified electrician will be the better option. But if you are confident in your capabilities, you can follow these steps.
Step 1: Gather the Tools
First, gather all the tools and materials required in the installation process. Ring has made every provision from the package to ease your work in installation.
These tools include a screwdriver, wall anchors, mounting screws, security screws, and a masonry drill bit. In addition to that, you may have to get a pencil, leveling tool, and drill driver which is sturdy. This is because you will need to drill your Ring Doorbell and fix the wires in brick or stucco.
Step 2: Turn Off the Power

Locate the breaker box in your house, usually in the basement, garage, or at the back of the house. Next, turn off the power supply to the doorbell. If you don’t know which breaker it is, turn off one at a time and then try the 120V power coming into the box.
You should use a voltage tester to ensure power isn’t running through the breaker. If the tester beeps, it means the power is still on. So, don’t go any further until you get the right breaker.
If you really can’t tell which breaker regulates the power output, power down the master breaker for your house.
Step 3: Install Transformer or Plug-in Adapter
If you decide to use a transformer, you should install it in a junction box near other electrical components in a crawlspace or basement. On the transformer, you will see three wires that should connect to power.
Now, mount the transformer and attach your home’s power wires to the matching wires on the transformer. The instructions for its installation are in the user manual, so check before connecting the wires.
In case you are using a plug-in adapter, identify a socket which is near the door where you plan to install your Ring Doorbell. Plug in the power cable and run the wire from the outlet to the location where you will install the doorbell.
Step 4: Drill Holes

Once you’ve decided where to put your device, use the mounting bracket as a guide to mark the mounting hole positions on the wall using a pencil. We suggest mounting your doorbell at about chest height and using a leveling device to make sure the alignment is even.
If you are installing on concrete, brick, or stucco, use a drill and the masonry drill bit to carefully create holes where you’ve marked on the wall. And then, put in the wall anchors (You can simply use a hammer to drive them in). Skip this step if you are mounting the bracket on wood or vinyl.
Step 5: Attach the Wires

At this point, you are going to attach the existing wires from your doorbell to the two screw terminals of the transformer or the plug-in adapter. This step is rather simple.
You only need to wrap the doorbell wires around the two available terminals and then tighten the terminals. No need to worry about which wire goes to which screw terminal as the doorbell will still work!
Once done, you can run the rest of the cable through or along your walls, window, or door and secure them with cable clips to keep them more secure.
Note: You may need to purchase an extension cord for the transformer or plug-in adapter if your outlet is far from your doorbell.
Step 6: Mount Your Ring Doorbell
With your holes previously drilled, you can now place the mounting bracket on the wall, then use the provided hardware to screw your Ring Doorbell in place. Don’t be afraid to use a little force. Also, be sure to feed any excess wiring into the wall first.
Now, pull the faceplate gently off the Ring doorbell from the bottom upward. It should pop off easily without using excessive force.
From there, snap the Doorbell onto the mounting bracket and then re-install the Ring cover. Tighten the security screws on the base of the device using the provided screwdriver.
Note: You shouldn’t use another mounting screw other than the one provided, as it may damage the faceplate.
Step 7: Restore Power to the Breaker
We’ve finally reached the exciting part. Now that the Ring Doorbell is mounted and wired, it is time to turn the power back on. The front light on your doorbell should light up to show that it’s powered properly.
After finishing this step, go ahead and press the Ring Doorbell button. Yes, you got that right! You can now pair your doorbell effortlessly with the home app on your smartphone or tablet.
Finish the Setup After Installation
Now that everything seems to be in order, the Ring App will walk you through everything you need to do, and it only takes a few minutes to get the doorbell all set up.
If you haven’t done it already, visit the app store on your smartphone and download the Ring App. After downloading, open the app and sign into your account or create one if you are a new user.
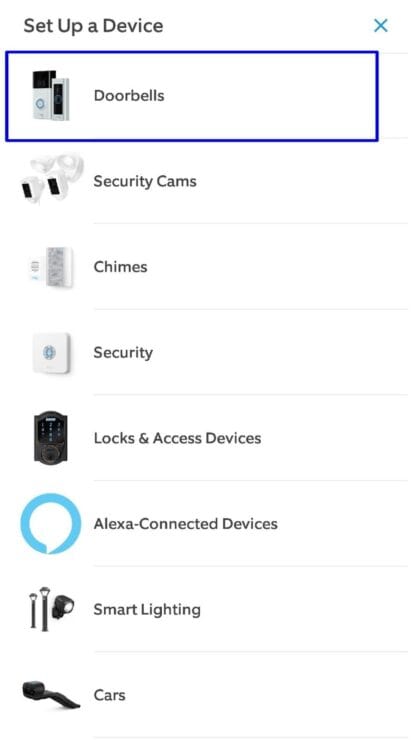
While on the app’s dashboard, click “Set Up A Device” and go to “Doorbells.”

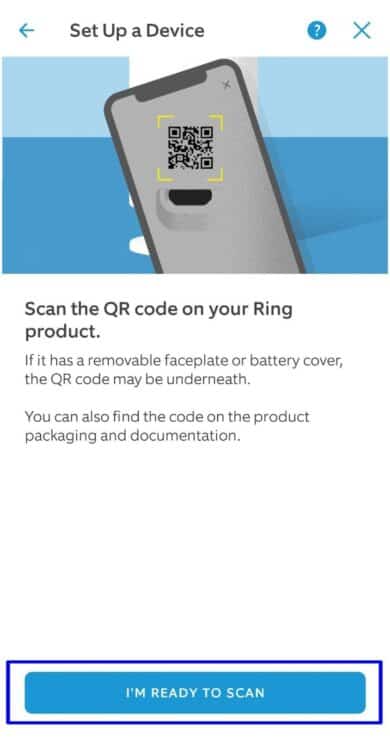
Hold up your phone, select “I’m Ready To Scan,” and scan the QR code, which can be found on the back of the instruction manual or the back of the doorbell.
The next step will involve connecting your Ring doorbell to your Wi-Fi network, so have your Wi-Fi password handy! Thereafter, use the Ring App to configure doorbell settings, such as what areas you want your camera to cover, what kinds of notifications you want, motion detection, and night vision settings, among others.
Don’t Forget to Install a Ring Chime if You Do Not Have One
The doorbell chime plays an important role in your doorbell system. When pushed, it notifies you that someone is at your front door by sounding a ring or chime.
Usually, the Ring video doorbell is linked to a digital or mechanical chime when the installation process is being done using an existing doorbell.
On the other hand, if your home does not have a doorbell set up, then it is a good idea to buy a plug-in chime, which is basically a simple alternative for the digital or mechanical chime.
The kit contains everything you need to set up the chime, including a plug-in receiver and transmitter that goes into an outlet for easy setup. This way, you just have to plug the Ring Chime into any standard power socket, and you get to hear the doorbell sound throughout your home.
How to Install a Ring Doorbell Chime in Your Home:
The steps for installing a Ring Doorbell chime are quite similar to those of Ring Doorbell installation.
First, turn off the power and test your circuit breaker with a voltmeter to ensure it is off. Figure out where you would like to install the chime on the wall and mark the mounting holes.
Once the markings are in place, drill the holes into the wall carefully, ensuring you do not interfere with other wires. The holes are where you will insert the toggle bolts included in your chime kit.
Now, place the chime cover on the wall and thread the wires through the open ports. Then, bolt or screw down the chime cover into the wall and wrap the wires around their corresponding screws.
Normally, there are three different screws; one for the “trans” (transformer), the “front” of the doorbell, and the “back.” Use the “back” if you want to set up the doorbell to a back door.
Once done, you can now turn the power back on and test the chime before screwing the front in place. If everything is functional, snap or screw the chime cover to the wall.
Quick Tip: For big homes, you can select a chime with a wide range or opt for an extra receiver to cover areas like the basement.
Frequently Asked Questions
How Do You Install a Ring Doorbell Without Drilling?
Find the no-drill mount in the Ring Doorbell box. This mount usually has double-sided adhesive on the back. Simply stick the no-drill mount, attach your compatible doorbell, and then hold it in place for about two minutes.
Removing the Ring Doorbell is also an easy process and damage-free. Just detach the doorbell from the mount and pull the adhesive strips down to remove the doorbell mount from the wall.
How Do You Connect a Ring Doorbell to a Transformer?
To install the Ring Doorbell on a transformer, first turn off the power in the fusebox. Next, you are going to attach the existing wires from your doorbell to the two screw terminals of the transformer.
Loop the doorbell wires around the two available terminals, then tighten the terminals to keep them secure. It does not matter which wire goes to which terminal.
Does the Ring No-Drill Mount Work?
Yes. The No-Drill mount is most effective on both even and smooth surfaces, though it may be difficult to stick it to shingles, rough stucco surfaces, or bricks. Also, ensure the wall or surface you want to adhere it to is wiped clean before attaching it.
Which Ring Doorbell Does Not Require Wiring?
The Gen 1 Ring Doorbell, Ring Doorbell 2, Ring Video Doorbell 3, and Ring Video Doorbell 3 Plus all operate on internal batteries. This means that they do not require any hardwiring to function. However, the Ring Doorbell Pro has to be hardwired; otherwise, it will not function.
Bottom Line
If you can operate a screwdriver and a smartphone, then you can install a wired Ring Doorbell by yourself. You don’t even have to have an existing doorbell! Luckily, it is an easy procedure, mainly for people who do not need to hire a professional. Just ensure you turn off the proper breaker before you start working on it.
If you have any questions, feedback or suggestions about this article, please leave a comment below. Please note that all comments go into a moderation queue (to prevent blog spam). Your comment will be manually reviewed and approved by Tristan in less than a week. Thanks!