Eufy cameras are packed with innovative features that make home monitoring easy and flexible. But are the mounting options just as versatile? I’ve seen several people ask whether it’s possible to install Eufy cameras upside down or sideways.
So to set the record straight, I compiled this quick guide. Not only is it possible, but it’s probably easier than you think. With the pro tips I’ve included, mounting your Eufy camera and securing your home will be a breeze.
Key Points
- Mounting a Eufy camera inverted or sideways requires the correct mount. The included screw mount may work, but not in all locations.
- Buy a compatible third-party mount, if needed, based on the installation site.
- Install the mount as appropriate for the mounting surface, taking care to secure it in place without any wobble.
- After attaching the camera, test the Live View in the eufySecurity app to see if everything looks okay. You can flip the video by 180° if it’s upside down.
Does Eufy Camera Work If Mounted Upside Down or Sideways?

Yes, Eufy cameras do work when mounted upside down or sideways. However, this type of installation can require a different type of mount, depending on the location. You can use the eufySecurity app to flip the video by 180° if it looks inverted.
Keep reading as I break down this process step-by-step so you can mount your Eufy camera in hard-to-reach positions with ease.
Detailed Breakdown of Mounting Eufy Camera Upside Down or Sideways
1) Check the Mounts Included with your eufyCam
Eufy packages their security cameras with either versatile magnetic mounts or fixed screw-in baseplates, depending on the model. Some include both, giving you more of a choice. So check what was included with your camera.
To install it upside down, you’ll likely need a screw-in fixed mount. A magnetic mount simply won’t be reliable when hanging on the ceiling, and over time, it may fail and cause your camera to crash on the floor and break.
For sideways mounting, you may be able to use a magnetic mount or a screw-in one based on the swivel, tilt, and pan functions available on the camera. Eufy’s Pan & Tilt models work well, but if you have another model, you may face restrictions while angling it.
The advantage of magnetic mounts is how easy the installation is, and it’s quick to adjust their position or detach the camera for charging. But they’re only recommended for indoor cameras; using one outdoors can be risky due to theft or tampering.
2) Choose your Installation Site

Next, you need to pick the installation site for your Eufy camera. Here are a few things to keep in mind:
- For ceilings, you’ll likely need to invert the camera fully upside down. You need a sturdy mount with good swivel and angle flexibility for this.
- For tall side walls, a 90-degree sideways tilt may work. But a tilt less than 45 degrees is easier with magnetic mounts. A height of 8-10 ft is recommended.
- The distance to power outlets and WiFi router needs to be within range at the chosen site. Your HomeBase also needs to be nearby for a strong signal.
- Outdoor locations require weatherproof, tamper-proof mounting and should be protected from sunlight (unless it’s a solar model).
- Point the camera lens slightly downward, approx. at an angle of 30°, wherever possible, for a wide field of view and better motion detection.
- In any case, you must make sure there’s no obstruction immediately in front of or on the side of the camera, as infrared reflection will hamper the recordings at night time.
The composition of your mounting surface also impacts which installation methods will work best. Eufy’s magnetic mounts work great on smooth-finished woods and some metals.
On textured surfaces like stucco or brick, screwing the mount directly into a wooden stud or masonry anchor will be the most secure. For drywall, adding bolts helps stabilize the mount in the wall cavity. Concrete surfaces may require pre-drilling with a masonry bit and anchors.
So now you need to check all the mounts and accessories that came in the package and figure out if it’s going to work for the installation site you’ve chosen. If it requires drilling and you’re uncomfortable with DIY, you can consider hiring a professional.
3) Buy a Third-Party Mount if Needed
If the mounts that came with the camera don’t seem to work for the type of installation you’re looking for, you can buy a third-party one, too.
In case you didn’t get a screw mount, you can buy a compatible third-party mount from Wasserstein or another brand. Just make sure the thread size matches the one on your camera; some new models, like eufyCam 3, have a different size compared to older generations.
Some mounts are specifically designed for sideways or upside-down installation, with greater angle adjustment and flexibility.
You can also look at other types of mounts, like a security mount, for better outdoor installation. And a gutter mount, which is useful for installing it on a fence, gate, eave, or other type of similar structure. It all depends on exactly where you want to install it.
Remember, choosing the right mount is the most important step because there’s simply no other way to install your camera upside-down or sideways. A wrong mount will likely restrict the field of view motion detection and may not be stable for holding the camera. You can watch this video to get a better idea of the different mounting options you could use.
4) Test the Camera’s Field of View
The next step is testing out the Eufy camera’s field of view from the chosen installation site before permanently mounting it. Since your camera is likely to be at an unusual orientation, it’s best to ensure it’ll fully cover the intended area for secure monitoring.
- Temporarily place the camera in the exact upside-down or sideways position using a ladder or stool. Get someone to help you with this if possible.
- If outdoors, you can do this testing at night to check the night vision coverage.
- Use the live view in the eufySecurity app to see what the camera can view from that angle. Pan, tilt and zoom as needed (if your camera supports it).
If you can see the full area that you want to monitor with no blind spots, then you can mark the mount positions with a pencil. If not, try adjusting again to see what works best.
For a sideways installation, it’s important to note that you’ll have to use a swivel mount to make the camera level again. The app doesn’t have a 90° rotation option; it only has a 180° option.
5) Install the Mount
Once you’ve marked the mount positions, it’s time to install it securely. The process varies for different types of mounts and different surfaces, but I’ll explain each one.
Screw Mounts
Screw-in mounts are the most common and what I would recommend for most people wanting to install their Eufy camera upside down or sideways. They allow a lot of flexibility.
- Use a drill bit that matches the size of your screws (usually ¼” threaded) to drill holes in the wall or ceiling at the marked positions.
- For concrete or plaster drywalls, you should use anchors (usually included with the eufyCam) to reinforce the screw hold.
- If it’s a wired cam, place the wire securely behind the provided hook.
- Then tighten the screws and secure the mounting plate onto the wall or ceiling.
- Make sure it’s stable and there’s no wobble. Next, you can attach the camera.
In most cases, the screw mount that came with your eufyCam should work fine for this purpose.
Magnetic Mounts
Magnetic mounts work well if you’re installing the camera sideways on a suitable surface. But it’s not going to hold a camera upside down, so there are limited types of installation you can do with this.
- Clean the mounting surface thoroughly and wipe with alcohol to remove any grease or dust, which could reduce adhesion.
- Use 3M tape to stick the magnetic mount onto the installation surface. Firmly press it and make sure it’s well in place.
- Wait for a few hours to let the glue bind to the surface properly. You can use additional adhesives if necessary.
- Attach the camera and test to see if it’s able to hold the weight consistently.
Remember, this works best on wood and smooth surfaces where the glue can easily stick. Concrete is not a recommended surface for using glue. If your magnetic mount has screw holes, you can use the previous method for this as well.
Security Mounts
Security mounts are a good option for outdoor installation where there’s a risk of theft. These usually have a key or some other secure mechanism that prevents people from tampering with the camera.
Follow your brand’s installation guide for this since the specifics vary between different third-party mounts.
Gutter Mounts
Gutter mounts are useful if you don’t want to drill holes in your wall and can be used in multiple locations.
- Check your gutter size and buy a compatible mount.
- Clip the mount onto the gutter and tighten the screws firmly so that there’s no wobble.
- Attach the camera and make sure it’s securely in place. Position for the best field of view.
Whichever mount you’re installing, make sure to double-check that it’s sturdy and secure before attaching your camera. For outdoor locations, you can consider applying some silicone sealant around the mount to weatherproof it (especially in rainy areas).
6) Adjust the Video Settings in eufySecurity App

Now that you’ve mounted the camera, it’s time to optimize the video settings for the best performance, particularly for unusual orientations.
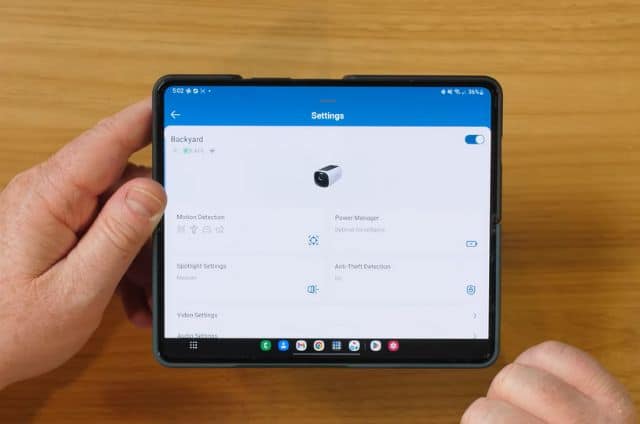
- If you mount your camera upside down, the image will appear inverted, too. You can flip this by 180° by opening the eufySecurity App > Settings (gear icon) > General > Mounting Guide > ‘Rotate Image.’ This should make the video appear normal again.
- Next, go to “Motion Detection” and recalibrate the activity zones and sensitivity to match the new perspective. You may need to increase or decrease the sensitivity depending on the orientation and field of view. You can draw zones to focus on the key areas and test them over the next few days.
You can tweak video quality, recording length, notifications, schedules, and other settings as per your preferences. This is also important for optimizing the battery life on wireless eufyCam models.
7) Test if the Eufy Camera is Working As Expected
Now, you just have to test that the camera is working as expected, along with all of its features. You can do this via the Live View in the eufySecurity app.
- Check if it’s able to detect motion by walking around or asking someone else to walk in front of it and seeing if you get any alerts.
- If you have facial recognition on your Eufy camera, then test that as well. Add a few familiar faces and then see if the camera can recognize them.
- For cameras with two-way audio, get someone’s help to test it. When installed on tall ceilings or in hard-to-reach spots, it may not work effectively.
- Check the infrared vision at night. If IR reflection causes overexposed, white-out video, then try angling the camera away from any nearby walls or reflecting surface. You should also turn off any floodlights that could add glare to the camera’s vision.
- Make sure the WiFi signal is strong and consistent. I recommend keeping the HomeBase in a central location so all your Eufy devices can easily connect to it.
If the video looks good in the Live View, and you’re able to see everything clearly, you’re all set. For help with adjusting the eufyCam’s settings properly, you can always reach out to Eufy support. Remember to clean the camera and keep the firmware updated regularly.
Interested in Eufy cams’ recording duration? Discover the maximum recording length and optimize your surveillance strategy for peace of mind.
FAQs
Can any Eufy camera be mounted upside down or sideways?
Most Eufy cameras can be mounted upside down or sideways, but it may require a third-party mount. The accessories that come in the box may not always work for unusual installations, but you can purchase another mount better suited for this. Then, you can flip the video by 180° to make it look normal again.
How do I buy the right third-party mount for my Eufy camera?
When buying third-party mounts for Eufy cameras, the threading size should match the camera’s mounting slot. Also, ensure the mount is rated for at least 1.5x your camera weight for a safety buffer. You can also look for weatherproofing, security features, and pan/tilt flexibility for versatile positioning.
Does motion detection work on an upside-down Eufy camera?
Yes, motion detection does work on an upside-down Eufy camera, but it can be less reliable. Eufy recommends installing the camera at a 30° tilt for best results. But if it’s facing down, its field of view is impacted, and the camera may not detect motion as effectively. To counter this, you can adjust the motion detection sensitivity in the Eufy app and set specific zones.
Conclusion
I hope this guide helped you mount your Eufy camera upside down or sideways as needed for the best security. The key is finding a suitable mount, adjusting the in-app settings, and optimizing the positioning for the ideal field of view.
And don’t hesitate to get creative with accessories and camera angles if it means eliminating blindspots in your home monitoring coverage.
Have you come up with any clever mounting solutions for your Eufy camera? Share your experience in the comments!


If you have any questions, feedback or suggestions about this article, please leave a comment below. Please note that all comments go into a moderation queue (to prevent blog spam). Your comment will be manually reviewed and approved by Tristan in less than a week. Thanks!